8 simple steps to basic ECG rhythm interpretation for nurses & nursing students
How do we standardize rhythm analysis?
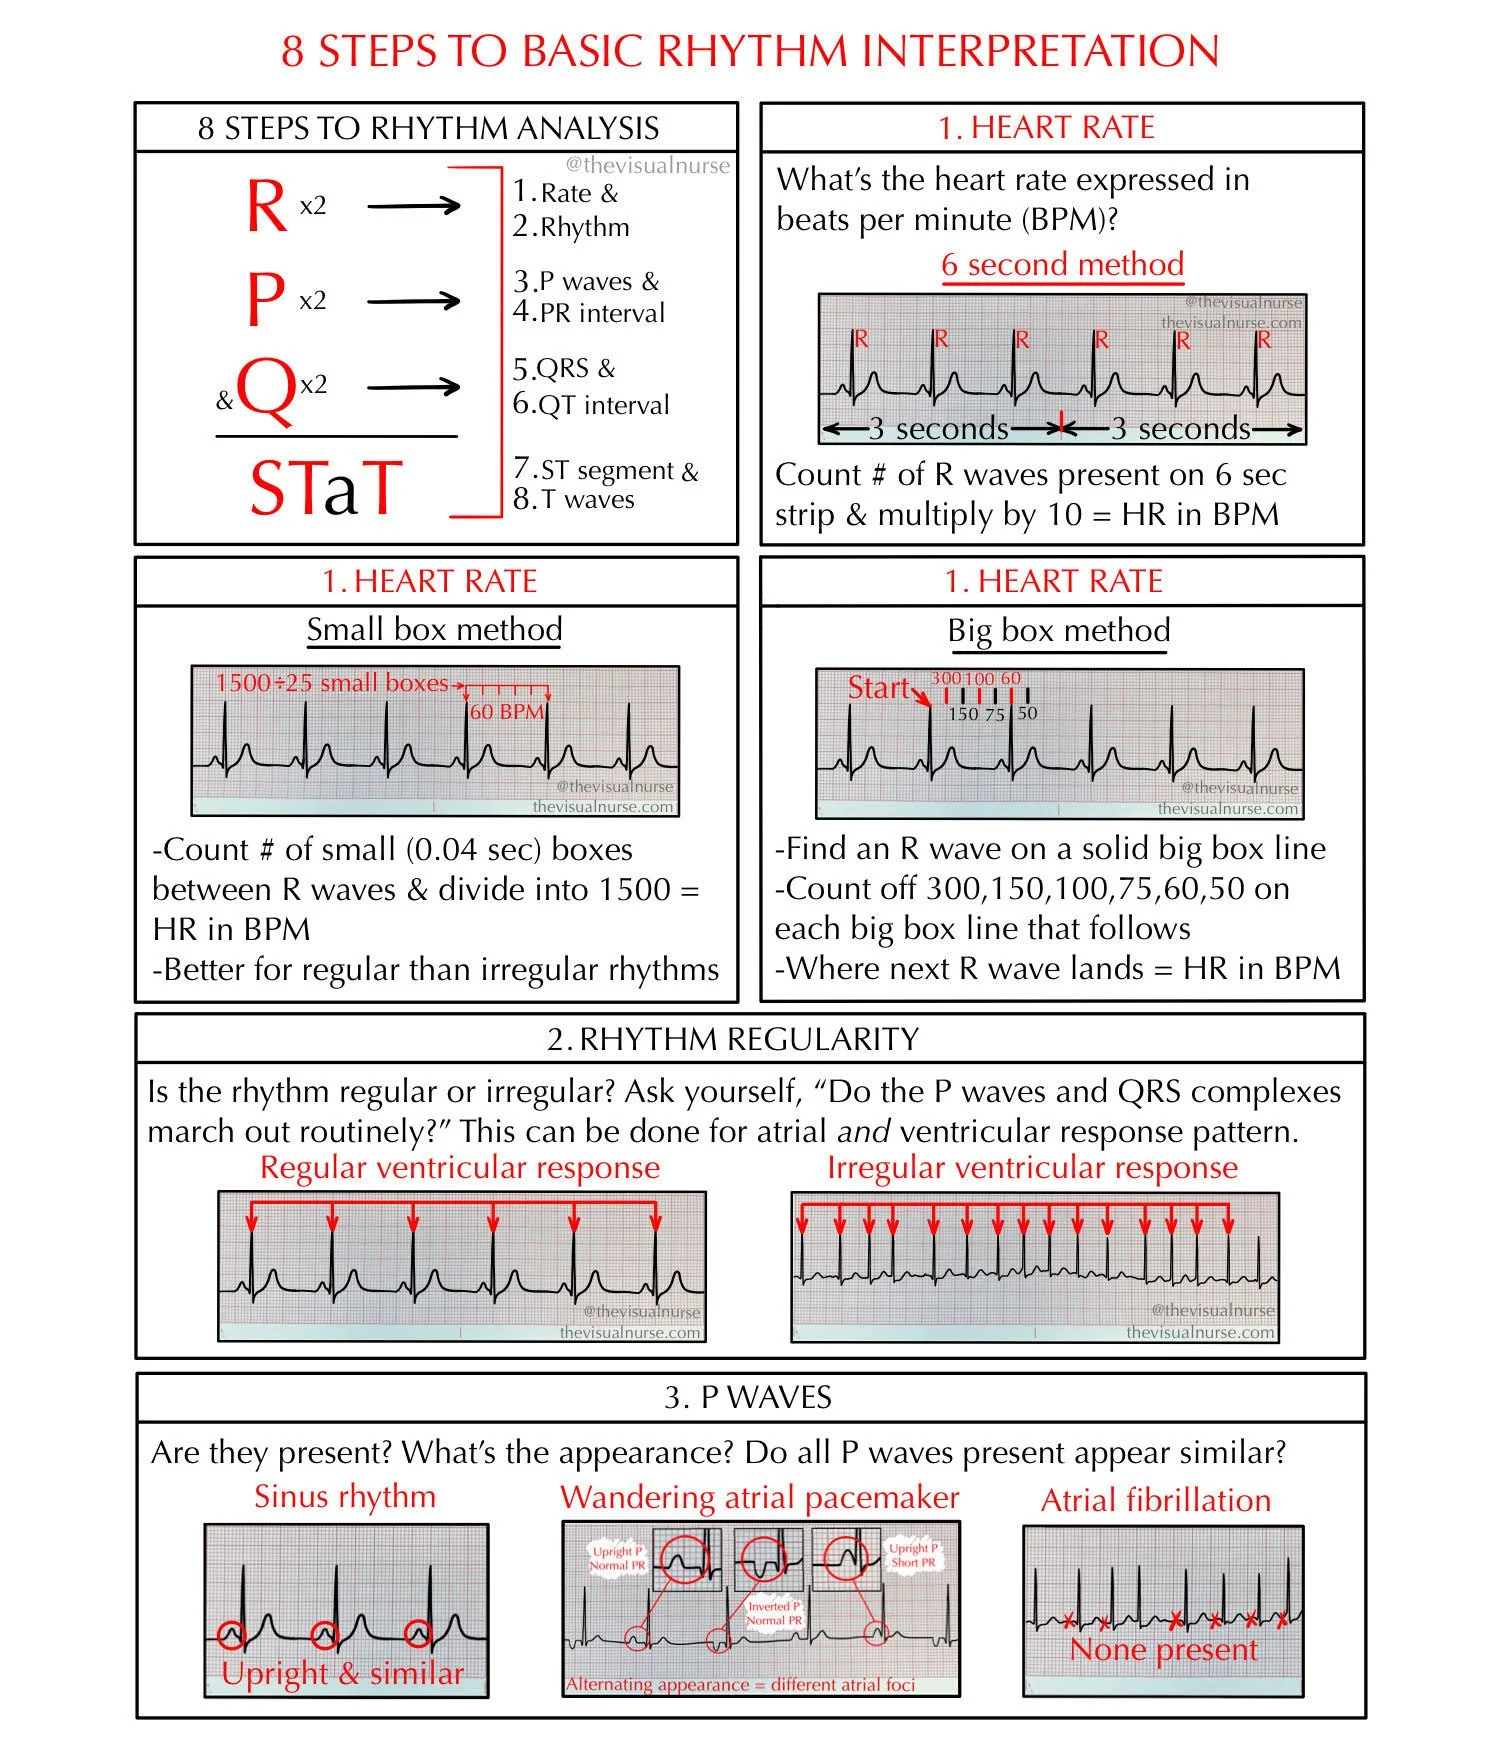
Pictured above is the 8 step rhythm analysis format that I use. The key to learning rhythm analysis initially is using the same stepwise progression every single time. This prevents us from becoming overwhelmed when we encounter the myriad of information presented within a single rhythm strip. Of course, with practice your eyes will learn to quickly skim and summarize these steps as second nature but first, we have to build the foundation that allows us to train our eyes over time.
Rhythm analysis can resemble a tangled mess of wires (like those you pull out of your attic each year around the holidays). Or it can take on the appearance of the clean, streamlined, labelled wires associated with a well-organized commercial computer server system. It’s up to you. So how do we keep from getting tangled up?
Rate: What’s the heart rate in beats per minute?
Rhythm (regularity): Is the rhythm regular or irregular, meaning “Do the P waves and QRS complexes march out routinely?”
P waves: Are they present? What’s the appearance?
PR: What does the PR interval measure?
QRS: What does the QRS interval measure? Is it narrow or wide?
QT: What does the QT interval measure?
ST: Is the ST segment elevated, depressed, or in line with the PR/TP segment?
T: Are they normal and upright or are they abnormal (peaked, flat, inverted, or biphasic)?
The trick is to follow the same process each time when first learning rhythm interpretation. Don’t be lured into getting tangled up in all of the information that a rhythm strip provides by jumping to step 6. Don’t step over nickels to pick up pennies. Sharpen your axe daily.
Follow @thevisualnurse on Instagram for more visual summary graphics like these and daily rhythm quizzes!
Instagram @thevisualnurse
TikTok @the.visualnurse

